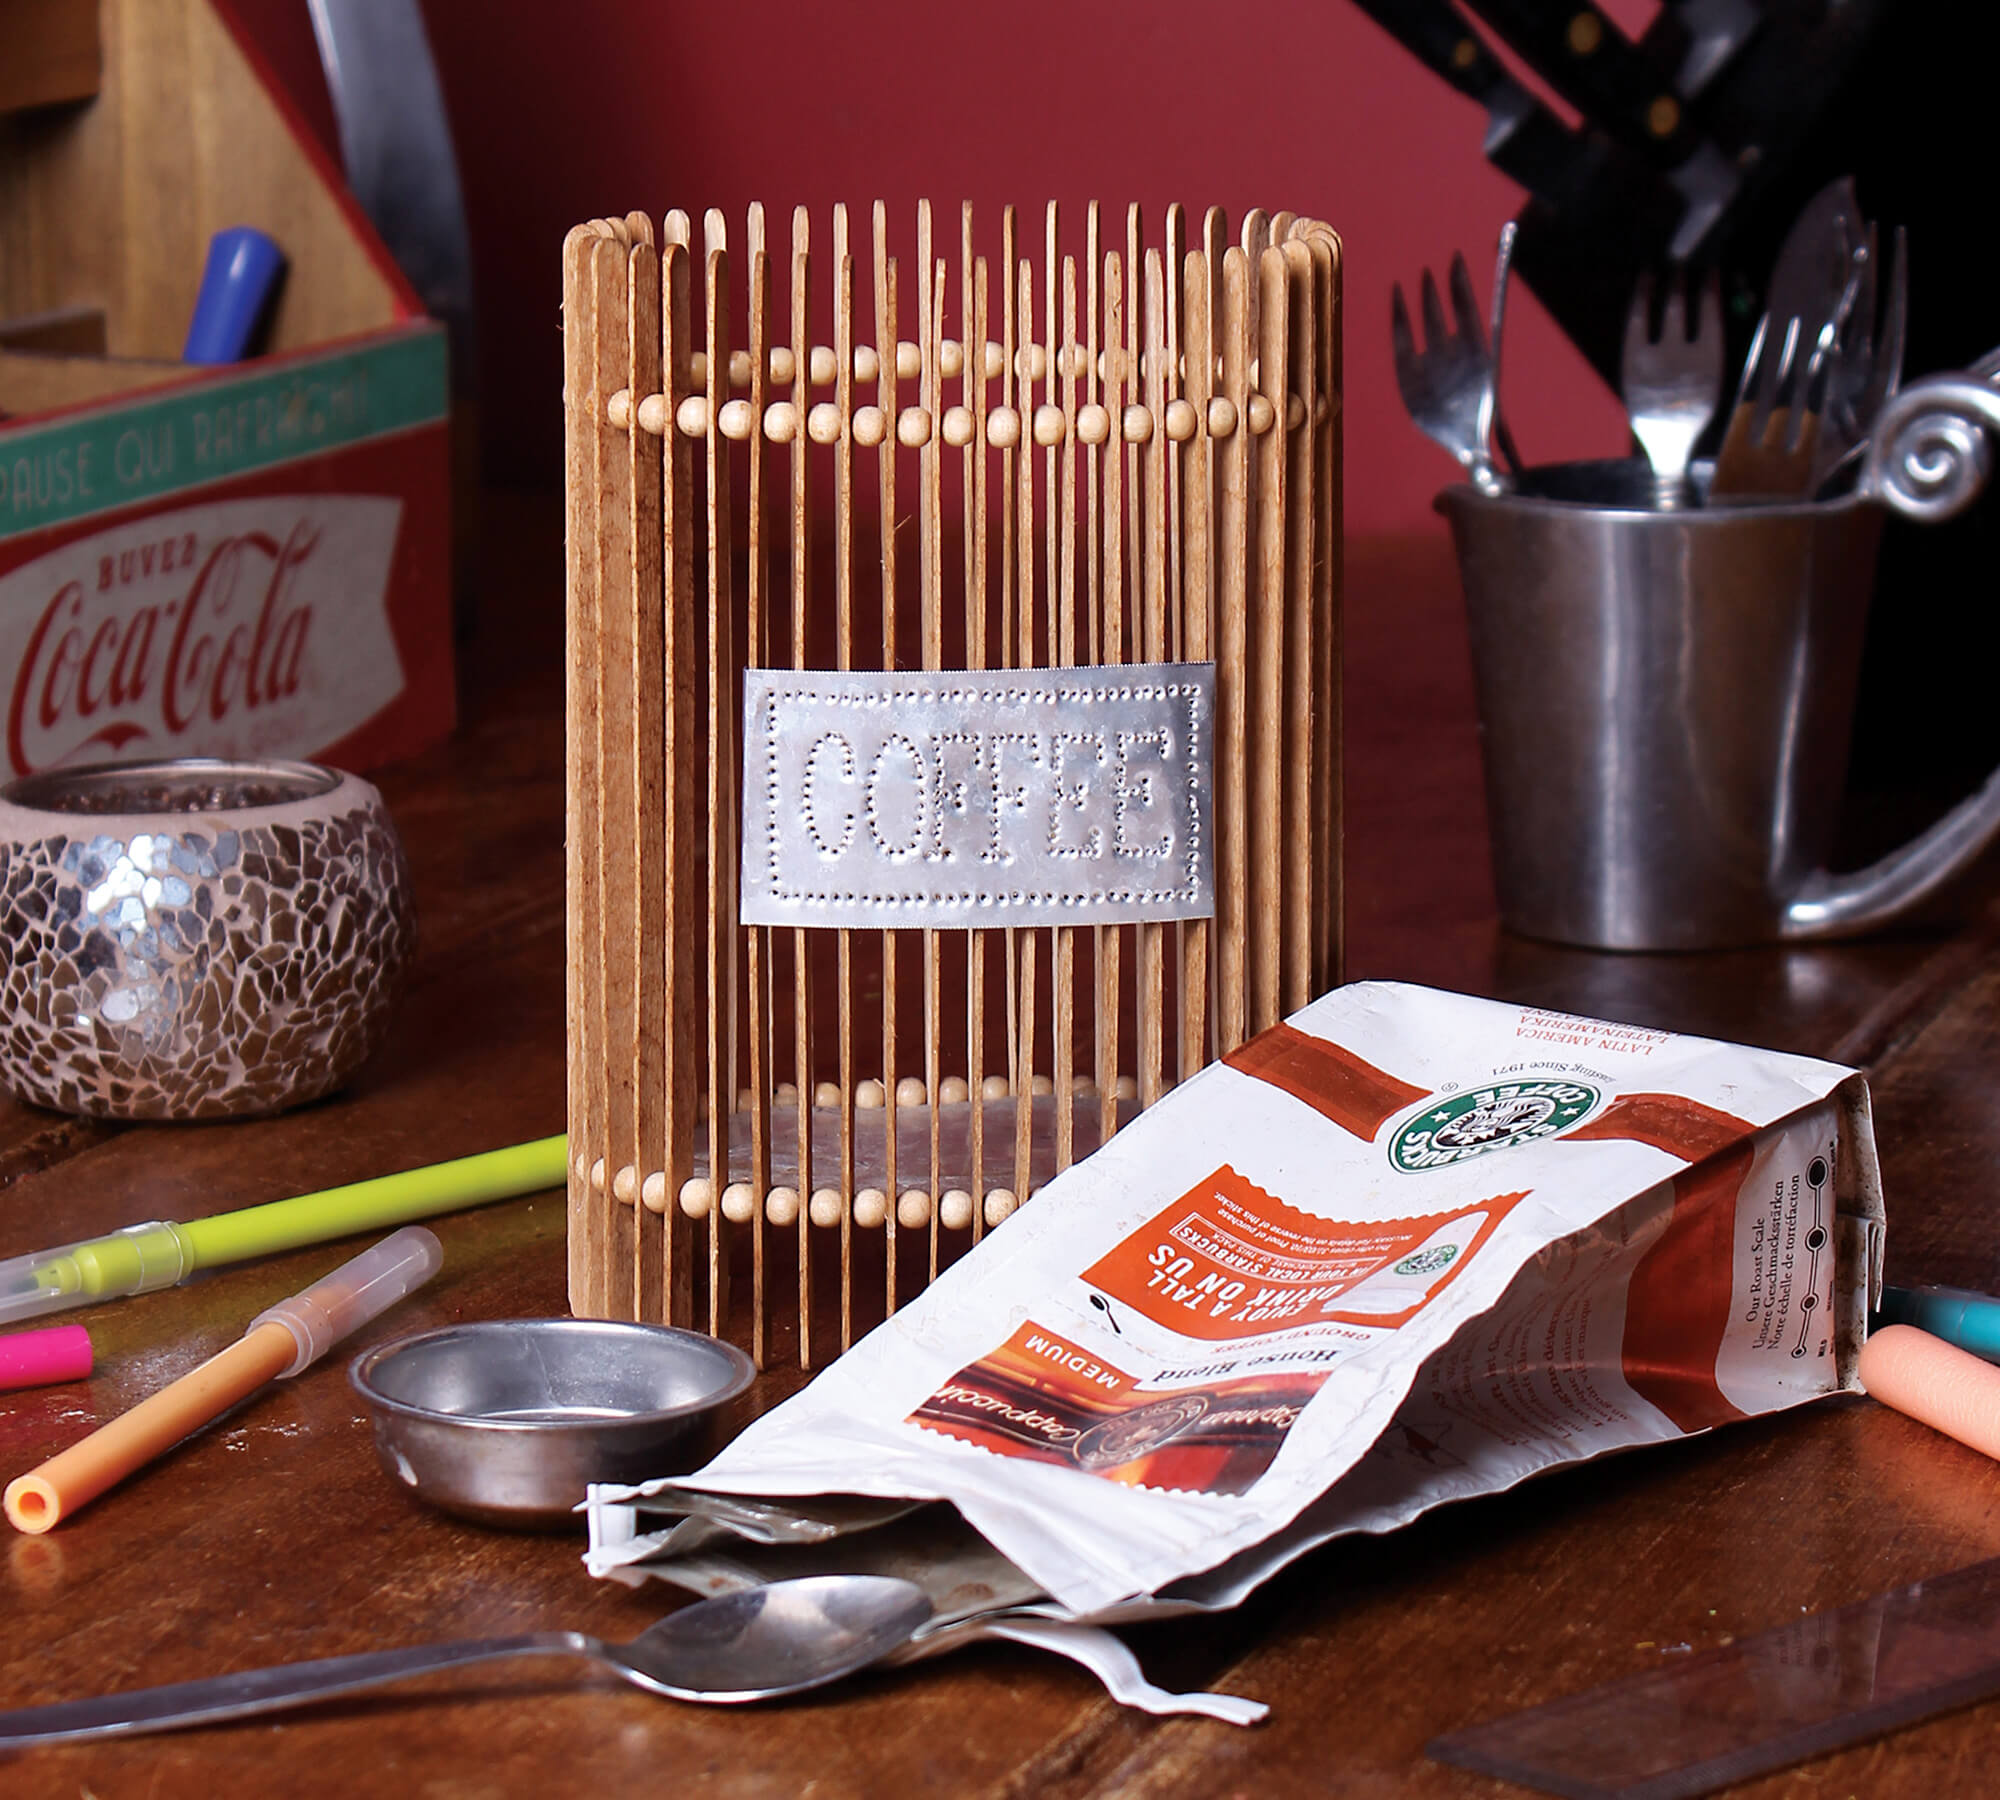
Turn Starbuck's 46 Stirring Sticks Into a Cool ContainerM
M
In 10 Cool Hand Drawn Steps
uber upcycling


Stop throwing your wooden Starbuck’s stirring sticks away, turn them into a designer decor instead!
This cool container was made from 46 stirring sticks, it can be used for storing a bag of ground coffee, or kitchen utensils.
Step by Step Guide
Let’s get going! It’s time to turn a coffee stirrer into a coffee container…

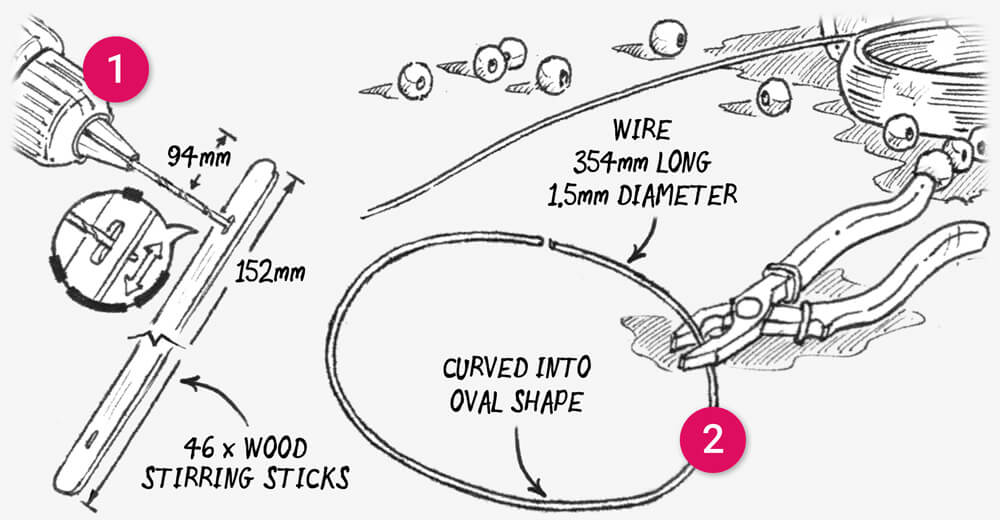
Step 1: Drill two 1.5mm holes 26mm from the ends of the 46 stirring sticks. Wiggle the drill up and down to elongate the hole.
Step 2: Use pliers to cut and bend a 320mm length of 1.5mm diameter wire into a oval shape. Repeat, and make a second oval.

Step 3: Slide a stirring stick and two wooden beads onto the two wires (as shown above) and repeat until the wire oval is filled.
Step 4: To complete the bowl walls, glue the ends of the wire into the last remaining bead using an epoxy based glue. Tip: if the wire is too long, trim it, and if it is too short, remove a stirring stick.

Step 5: Use tin snips to cut out a rectangular section from a soda can.
Step 6: Stand the ‘bowl wall’ onto the rectangle and trace around it. Cut out the shape using tin snips, this is the base, and trim it until it fits snugly within the bowl wall.
Step 7: Finally, secure the base inside the bowl wall, just below the row of beads, using blobs of epoxy glue.

Step 8: Draw your label design onto a piece of paper (mine said ‘COFFEE’) and tape it onto a rectangular piece of soda can. Use a hammer and nail to tap little ‘holes’ along the design.
Step 9: Remove the paper and tape and glue the finished label onto the side of the bowl using more epoxy glue.
Step 10: Finally, if you’d like you bowl to be another colour, paint the wooden stirring sticks and beads with a wood stain.
Materials List
- 46 wooden stirring sticks
- 92 small beads - 6mm in diameter
- One soda can
- Wire - 1.5mm thick
- Paper, epoxy glue
- Sharp nail
- Hammer, tin snips, pliers
- Drill with 1.5mm drill bit
- Ground coffee and a paint brush
Creative Takeaway
Small things, like a stirring stick, provide as much creative opportunity as the big things… just use them in larger numbers!
Also, wood in any form is a fantastic craft resource… so hang on to old chopsticks and lolly sticks as well!